

How To Install Phalcon and Configure with Apache on Ubuntu 20.04 - Complete Guide
Hello, PHP, my old friend.

Specializing in Laravel and Phalcon PHP | Pro in ERP Management, Accounting Software, and Database Management
Install and Configure Phalcon and Apache on Ubuntu 20.04 - Complete Guide
In This Article, We will go over the steps of Installing Apache and Phalcon on Your ubuntu system. Before going to the setup we need to know about Phalcon Framework.
What is Phalcon?
Phalcon is an open-source framework quite popular among developers. It is a combination of PHP and C language. Phalcon is developed by Andres Gutierrez and his group of collaborators.
Phalcon is a high-performance PHP framework based on the model-view-controller (MVC) architecture. Its initial release dates back to 2012 and it has always been open-source. The crux of it has been written in C and Zephir programming languages. Phalcon is also famous for being the first framework to implement object-relational mapping (ORM) in C.
⚙️ If you're stuck configuring Phalcon with Apache/Nginx, I can help fix extension loading issues, PHP-FPM config problems, and server setup in a short live session.
Book a quick Phalcon-Apache/Nginx fix →
INSTALL APACHE SERVER ON UBUNTU
Install Apache2
Launch the Terminal by using the Ctrl+Alt+T shortcut and execute the following command:
Step 1 : Update Packages
sudo apt update
Step 2: Install Apache2
In the next step, we install the apache2 server. execute the below command.
sudo apt install apache2
The System will ask the confirmation Y/n confirmation and Press Y for successful confirmation.
Now check the version using this command.
apache -v

Step 3: Firewall Configuration
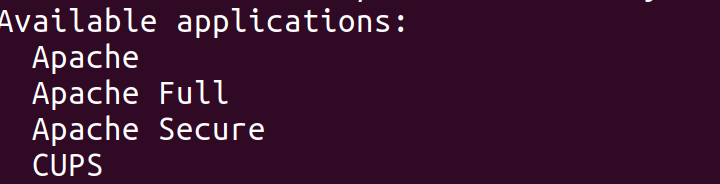
First, let’s list the application profiles that we need to give Apache access to. Run the following command
sudo ufw app list
Note: if sudo: ufw: command not found error thrown in terminal install ufw package
sudo apt-get install ufw
We will use the highly restrictive profile ‘Apache’ to enable network activity on port 80.
Execute the below command:
sudo ufw allow ‘Apache’
After Successful Installation of Apache Server. check the status of the apache server using the below command
sudo ufw status
Apache Server Management Commands
%[https://gist.github.com/dhanar98/e6a9c069a43be28efaa04132904085ba] ⭐ Press Star
INSTALL PHP-MYADMIN ON UBUNTU
Install Php-Myadmin to execute the Command
sudo apt install phpmyadmin
After Installation Do these Steps ⬇️
Select server option
apache2.Select
yeswhen askingdbconfig-commonto set up the database.Select Abort Option to configure Database Setup.
Install MySQL-server.
Configure PHP-MyAdmin Server
Create a Configuration File
sudo touch /etc/apache2/conf-available/phpmyadmin.conf
Copy and Paste this Configuration
<Directory /usr/share/phpmyadmin>
    Options SymLinksIfOwnerMatch
    DirectoryIndex index.php
    AllowOverride All
To implement the changes you made, restart Apache:
sudo systemctl restart apache2
Note: Every configuration update we need to execute this command
INSTALL MYSQL SERVER ON UBUNTU
**Step 1: Install Mysql-Server **
sudo apt install mysql-server
Step 2: Secure Mysql Server
sudo mysql_secure_installation
After this command confirms with yes. Then Enter the password for MySQL Server. After installation is completed.Execute the command
Step 3: Set a User and Permissions
sudo mysql -u root -p
 mysql> CREATE USER 'root'@'localhost' IDENTIFIED BY 'password';
 mysql> GRANT ALL PRIVILEGES ON *.* TO 'root'@'localhost' WITH GRANT OPTION;
 mysql> exit
INSTALL PHP AND MODULES VERSION 7.4
Now we need to install PHP 7.4 version for the support of Phalcon-4.1.2v. (Stable Version)
Step 1: Install PHP-7.4 Version and Modules
sudo apt update && sudo apt upgrade

sudo apt install software-properties-common

sudo add-apt-repository ppa:ondrej/php

sudo apt update

sudo apt install -y php7.4
#Other Additional Packages
sudo apt install php7.4-curl php7.4-gd php7.4-json php7.4-mbstring

sudo apt install php7.4-zip php7.4-fpm php7.4-cli php7.4-dev

sudo apt install libpcre3-dev php7.4-xml php7.4-mysql

sudo apt install php7.4-imagick

sudo apt install php7.4-mysql php7.4-pgsql
Note: We need to PSR to run phalcon module in apache-server
Step 2: Install PSR Extension
sudo apt install php7.4-psr
Step 3: Enable FPM in Apache2
To enable PHP 7.4 FPM in Apache2 do this command
sudo a2enconf php7.4-fpm

sudo systemctl restart apache2
To Compile Phalcon Framework we need to install gcc package
sudo apt install gcc
INSTALL PHALCON ON UBUNTU
Install phalcon stable version-4.1.2
Download Phalcon-4.1.2-Stable Release ⬇️
** Install Phalcon module to execute these commands:**
Before that extract and unzip the folder and Move to Home in File Explorer.
Install Stable Repository Distribution
Stable release
curl -s https://packagecloud.io/install/repositories/phalcon/stable/script.deb.sh | sudo bash
Compile Phalcon Module
cd cphalcon-4.1.2/build
sudo ./install
After Successful Installation Execute Server Start Command
sudo systemctl restart apache2
Load the Phalcon Extension Web Server Create a file called 30-phalcon.ini in this 3 Places
☄️ /etc/php/php7.4/apache2/conf.d/
☄️ /etc/php/php7.4/fpm/conf.d/
☄️ /etc/php/php7.4/cli/conf.d/
add this content
extension=phalcon.so
Run this command to FPM Server Restart
sudo service php7.4-fpm restart
Find all PHP Modules in Single Command
php -m

#Check Phalcon is installed or not
php -m | grep phalcon
Phalcon Successfully configured with apache
References ⬇️
🔗 - https://docs.w3cub.com/
Note:
I faced an issue with the latest version of PHP, so going especially for 7.4 which is best compatible with the release.
Still Facing Issues Configuring Phalcon + Nginx? 🔧
I help developers fix server config errors, PHP module issues, and Phalcon setup problems across Ubuntu, and Windows.
👉 Fix Phalcon + Apache/Nginx with Me (Live Session)
I hope it helps all of us. Keep Support and Follow 💜💜💜


