

How To Configure Phalcon in Nginx Server on Ubuntu 20.04 - Complete Guide
First, solve the problem. Then, write the code - John Johnson

Specializing in Laravel and Phalcon PHP | Pro in ERP Management, Accounting Software, and Database Management
Configure Phalcon in Nginx Server on Ubuntu 20.04
In this guide, you’ll learn how to install Nginx on your Ubuntu 20.04 server and Configure it with Phalcon and Phalcon Project.
What is Nginx?
Nginx is a free, open-source, high-performance HTTP server and reverse proxy, as well as an IMAP/POP3 proxy server. Unlike traditional servers, Nginx doesn’t rely on threads to handle requests. Instead, it uses a much more scalable event-driven (asynchronous) architecture. This architecture uses small, but more importantly, predictable amounts of memory under load.
INSTALL NGINX SERVER ON UBUNTU
Install Nginx
Launch the Terminal by using the Ctrl+Alt+T shortcut and execute the following command:
**Step 1: Update Packages **
sudo apt update
Step 2: Install Nginx Server
In the next step, we install the Nginx server. execute the below command.
sudo apt install nginx
Checking Nginx Server
At the end of the installation process, Ubuntu 20.04 starts Nginx. The web server should already be up and running.
Step 1: Check the Nginx Status
Check the status to execute the below command
sudo systemctl status nginx
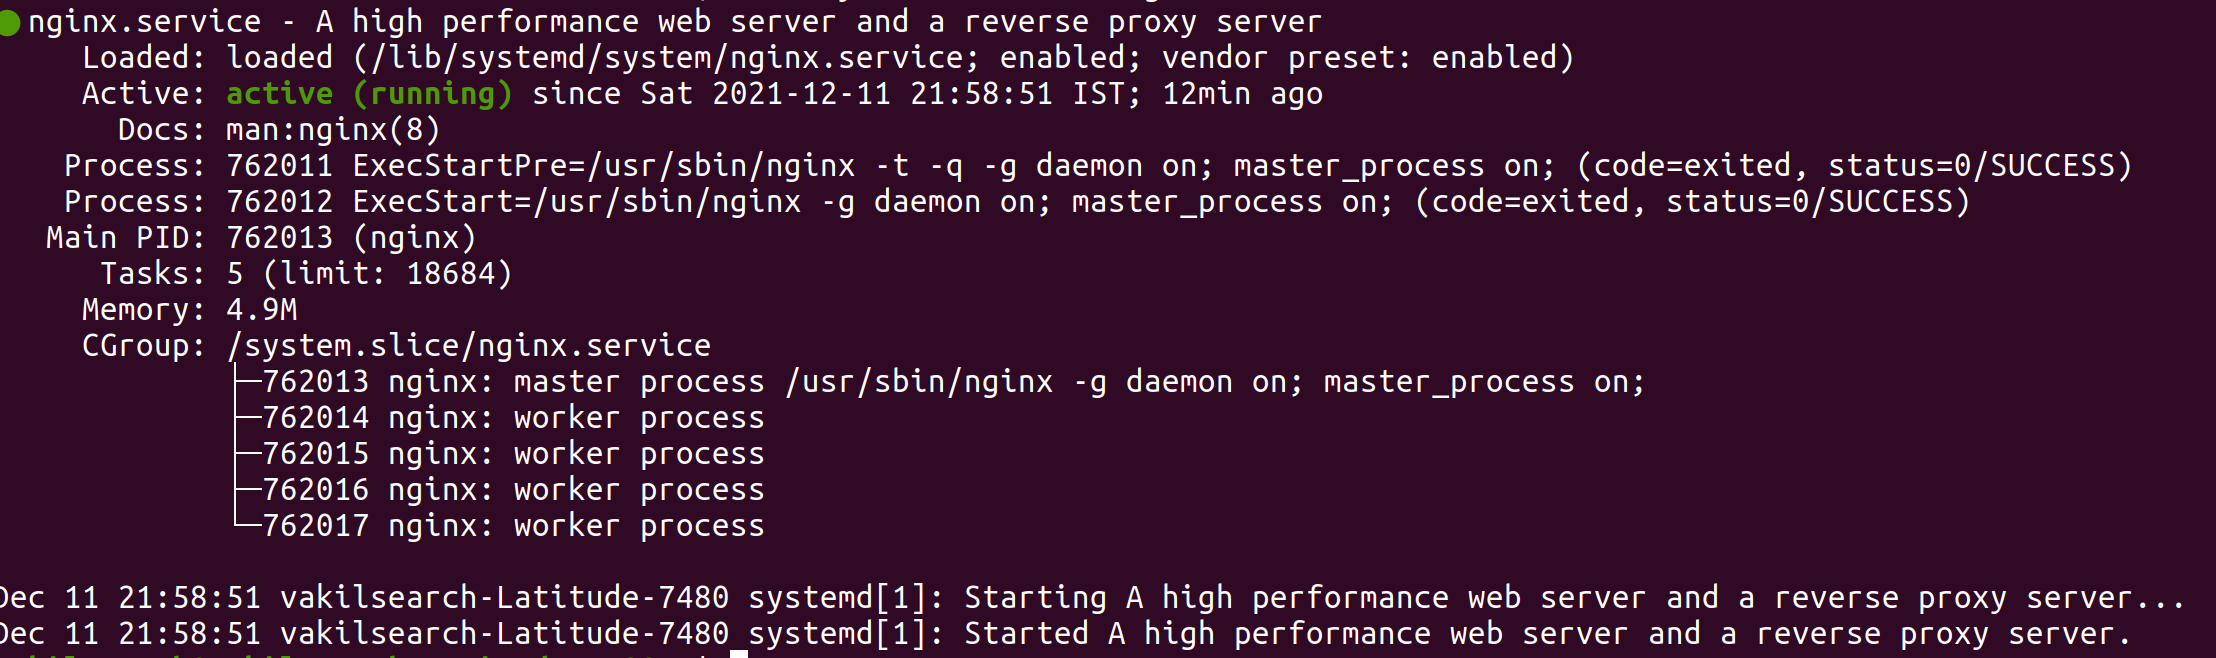
This output shows that the service has started successfully. However, the best way to test this is to actually request a page from Nginx.
You can access the default Nginx landing page to confirm that the software is running properly by navigating to your server’s IP address. If you do not know your server’s IP address, you can get it a few different ways.
⚙️ If you're stuck configuring Phalcon with Nginx, I can help fix extension loading issues, PHP-FPM config problems, and server setup in a short live session.
Book a quick Phalcon/Nginx fix →
Nginx Server Managing Commands
Now that you have your web server up and running, let’s review some basic management commands
INSTALL PHP AND MODULES VERSION 7.4
Now we need to install PHP 7.4 version for the support of Phalcon-4.1.2v. (Stable Version)
Step 1: Install PHP-7.4 Version and Modules
sudo apt update && sudo apt upgrade

sudo apt install software-properties-common

sudo add-apt-repository ppa:ondrej/php

sudo apt update

sudo apt install -y php7.4
#Other Additional Packages
sudo apt install php7.4-curl php7.4-gd php7.4-json php7.4-mbstring

sudo apt install php7.4-zip php7.4-fpm php7.4-cli php7.4-dev

sudo apt install libpcre3-dev php7.4-xml php7.4-mysql

sudo apt install php7.4-imagick

sudo apt install php7.4-mysql php7.4-pgsql
Note: We need to PSR Module to run phalcon module.
Step 2: Install PSR Extension
sudo apt install php7.4-psr
Step 3: Enable FPM in Nginx
To enable PHP 7.4 FPM in Nginx do this command
sudo a2enconf php7.4-fpm

sudo systemctl restart nginx
To Compile Phalcon Framework we need to install gcc package
sudo apt install gcc
INSTALL PHALCON ON UBUNTU
Install phalcon stable version-4.1.2
Download Phalcon-4.1.2-Stable Release ⬇️
** Install Phalcon module to execute these commands:**
Before that extract and unzip the folder and Move to Home in File Explorer.
Install Stable Repository Distribution
Stable release
curl -s https://packagecloud.io/install/repositories/phalcon/stable/script.deb.sh | sudo bash
Compile Phalcon Module
cd cphalcon-4.1.2/build
sudo ./install
After Successful Installation Execute Server Start Command
sudo systemctl restart nginx
Load the Phalcon Extension Web Server Create a file called 30-phalcon.ini in this 2 Places
☄️ /etc/php/php7.4/fpm/conf.d/
☄️ /etc/php/php7.4/cli/conf.d/
add this content
extension=phalcon.so
Run this command to FPM Server Restart
sudo service php7.4-fpm restart
Find all PHP Modules in Single Command
php -m

#Check Phalcon is installed or not
php -m | grep phalcon
Phalcon Successfully configured with Nginx
References ⬇️
Configure Phalcon Project with Nginx
The Basic Structure of Phalcon Project
phalcon/
  app/
    controllers/
    models/
    views/
  public/
    css/
    img/
    js/
    index.php
Create a project /var/www/ directory.
Example : /var/www/phalcon/
Next, assign ownership of the directory with the $USER environment variable:
sudo chown -R $USER:$USER /var/www/phalcon
The permissions we need to webroot are also confirmed with this command.
sudo chmod -R 755 /var/www/phalcon
Create Server Block in Server
To create a configuration file /etc/nginx/sites-available/ in this path ⬇️
Enable the Nginx Server
To enable the file creating the link in Nginx Server.
Execute this command:
sudo ln -s /etc/nginx/sites-available/phalcon.conf  /etc/nginx/sites-enabled/

sudo systemctl reload nginx
Phalcon Project Successfully configured with Nginx Server Now run the project in the browser
Still Facing Issues Configuring Phalcon + Nginx? 🔧
I help developers fix server config errors, PHP module issues, and Phalcon setup problems across Ubuntu and Windows.
👉 Fix Phalcon + Nginx with Me (Live Session)
References ⬇️
🔗 - docs.w3cub.com
Note :
I faced an issue with the latest version of PHP, so going especially for 7.4 which is best compatible with the release.
Keep Support and Follow 💜💜💜


